
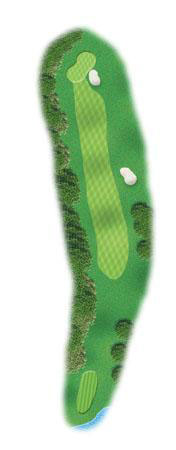
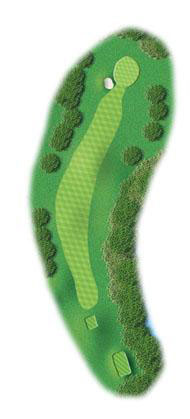
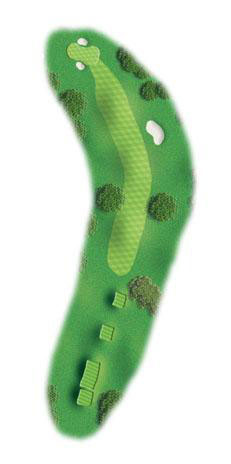
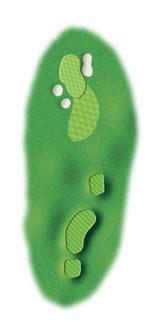
Hole #1 Par 4
(HCP 16)
Number one’s going to test you. The first hole at Cannon requires a well-placed drive that favors a left-to-right tee shot. A fairway bunker protects the left side, while the right side is sprinkled with trees. The tee shot is well protected by large oaks that require your drive to start straight. A well-hit drive will leave a mid to short iron to a relatively flat green. Great hole to begin your round, now grab your bag and move to the next challenge!
Yardage
Blue – 351
White – 345
Gold – 330
Red – 309
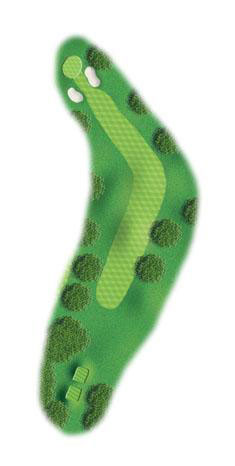
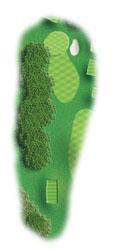
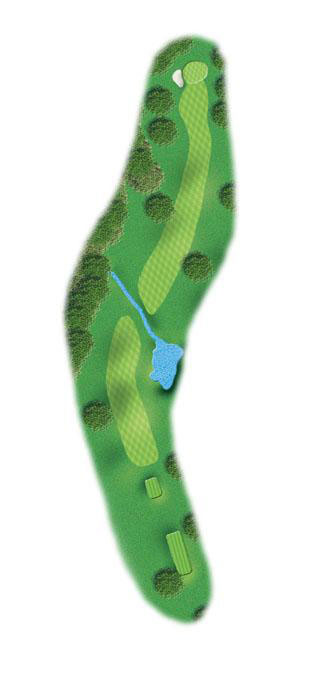
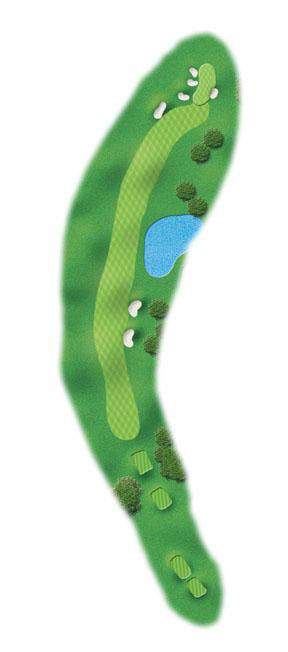
Hole #2 Par 4
(HCP 4)
This fairly short par 4 offers for a challenging tee shot. There is a hazard on the right as well as a hazard lining the entire left side of the hole. A fairway bunker along the right side will come into play off the tee. There is a greenside bunker that protects the right side of the green making approach shots difficult when the pin is in the back.
Yardage
Blue – 361
White – 337
Gold – 285
Red – 285

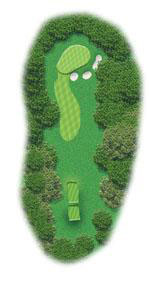
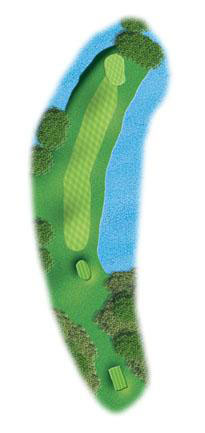
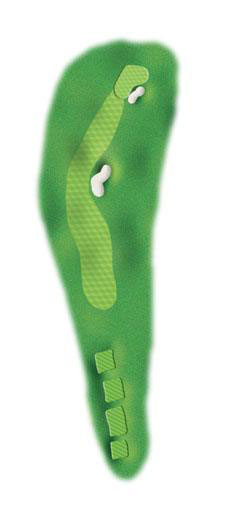
Hole #3 Par 4
(HCP 10)
This is a tough par 4. You will be hitting your tee shot uphill and over water. Fairway bunkers on the left and right side of the fairways will come into play off of the tee for longer hitters. Beware of the hazard on the left side! Once you get up the hill, you will have to go back down on your approach shot. Be careful not to hit it too long because there is a hazard surrounding the back of the green!
Yardage
Blue – 403
White – 396
Gold – 319
Red – 279

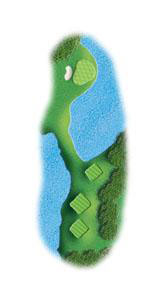
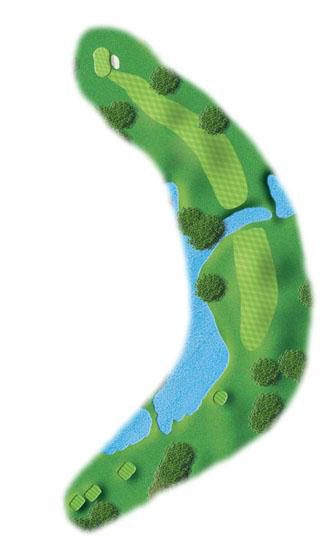
Hole #4 Par 5
(HCP 2)
Cannon Golf Club has some great par 5’s, most notable Number 4, which runs along the Cannon River. It’s very demanding, requiring a tight tee shot through a narrow opening that’s protected by a large tree. The Cannon River runs along the right side of the hole. This one isn’t long, by any means, but it is narrow off the tee. Big hitters can just bang it over the top of the large cottonwood to the left of the fairway.
Yardage
Blue – 463
White – 441
Gold – 399
Red – 399

Hole #5 Par 4
(HCP 12)
A hazard lines the right side of the entire hole, but the left side is not much better with several trees that will make for a difficult second shot. There is a fairway bunker on the right side which is reachable for longer hitters. Two good shots will be rewarded.
Yardage
Blue – 348
White – 325
Gold – 309
Red – 302
Hole #6 Par 4
(HCP 8)
One of the longer par 4s and some might say most difficult. If you miss the fairway, there is a good chance that you will have a large tree in the way for your second shot. Bunkers on the left and right side protect the green. Once you are on the green be careful. You may run into some slippery putts. Three even four putts are not unheard of here.
Yardage
Blue – 413
White – 366
Gold – 329
Red – 307
Hole #7 Par 3
(HCP 6)
Bring your best to #7. This is a long par 3 from both the White tees and the Blue Tees. The hole is protected by water hazards left, right and behind the green! The very large green is protected by several bunkers in front and to the right. This par 3 is home to more double bogeys than pars!! Sharpen up your hybrid game or your fairway wood shots for this one.
Yardage
Blue – 221
White – 202
Gold – 175
Red – 148
Hole #8 Par 4
(HCP 14)
Number 8 is the shortest par 4 on the course. Course knowledge is important here. You can either lay up in the fairway or you can go for the green by hitting a blind tee shot over a large hazard. Your risk can be rewarded here.
Yardage
Blue – 333
White – 326
Gold – 307
Red – 307
Hole #9 Par 3
(HCP 18)
If you are going to miss the green, you are wanting to miss it short. Going over the green makes it nearly impossible to keep your second shot on this green. Try to keep everything below the hole, otherwise a putt may turn back into a chip. A greenside bunker protecting the right side makes for difficult up and downs.
Yardage
Blue – 163
White – 161
Gold – 125
Red – 125

Hole #10 Par 4
(HCP 7)
At its peak, the most difficult green on the course is usually #10. Expect speed, more speed and a lot of slope on this two-tiered green. (Rumor has it that one of our members took seven putts on this hole in the club championship. No names, please.) This hole requires a shot of about 200 yards off the tee which will leave a nice “easy” short iron shot to a narrow green protected in the front by a running stream and beyond by a wooded area. The second shot is a beautiful one to look at and is a favorite of many of our golfers.
Yardage
Blue – 315
White – 295
Gold – 275
Red – 275
Hole #11 Par 4
(HCP 11)
Requires a well-placed tee shot. Water lines the entire right and left side of the hole. Driver is not necessary off the tee. Once you make the fairway you will have a mid to short iron into a fairly flat green. If you go long, you might find yourself fishing for your ball.
Yardage
Blue – 375
White – 339
Gold – 280
Red – 280
Hole #12 Par 3
(HCP 9)
A Great Hole Here at #12: The best par three. At about 165 yards, with a green protected by water on three sides, you’ll need luck or finesse at 12. There’s also a large bunker protecting the back, left of the green. Hitting off the tee can be tricky if you don’t account for the wind. Once you get to this well protected green it isn’t over. This green has more undulation than any other green on the course and several pin positions will definitely make a two putt tough, if not impossible
Yardage
Blue – 168
White – 155
Gold – 109
Red – 109
Hole #13 Par 5
(HCP 1)
Long par five that requires three well placed shots. You will hit your tee shot over water. Be careful of the huge cottonwood tree in the middle of the fairway. Once you reach the fairway, you once again have to hit it over a creek. The toughness is not over. You will hit your approach shot into a severe back to front slope. Don’t feel bad about a three putt!
Yardage
Blue – 549
White – 512
Gold – 455
Red – 427
Hole #14 Par 5
(HCP 3)
If you didn’t have enough fun on #13, you can get another chance at a par 5. Long hitters can try their luck to get over the water on the tee shot. Most players will lay up to be safe. Three good shots will get you to the green
Yardage
Blue – 537
White – 525
Gold – 453
Red – 453
Hole #15 Par 4
(HCP 15)
One of the newly renovated holes, this dogleg left makes for a tough hole. A bunker will hurt you if you roll through the fairway off the tee. You will be hitting your approach shot into a severely sloped green with a pot bunker guarding the back pin placements.
Yardage
Blue – 390
White – 363
Gold – 312
Red – 278
Hole #16 Par 4
(HCP 13)
A straight forward par 4. There is a fairway bunker on the right side that will come into play off the tee. Another bunker guards the front right side of the green. The green will be a relief after playing the sloped greens prior to this one.
Yardage
Blue – 412
White – 384
Gold – 347
Red – 315
Hole #17 Par 3
(HCP 17)
Can make for a long and hard par 3. The enormous green is surrounded by bunkers. Even if you hit the green it may take you three shots to get down. You may find the longest putt on the course here.
Yardage
Blue – 205
White – 175
Gold – 157
Red – 118
Hole #18 Par 5
(HCP 5)
A great finishing hole. #18 is a par 5 uphill, dogleg right. You may think you hit a great tee shot but you never know because you can’t see it land! Once you’ve hit your tee shot you may have to hit your second shot over a pond located along the right side. There are a total of four fairway bunkers spread out along the right side of the hole and also one on the left. You are not out of trouble once you get past these. There are four more bunkers surrounding the green. The green is big and slippery!
Yardage
Blue – 574
White – 547
Gold – 411
Red – 403